


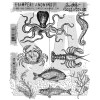
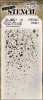
I did a double interpretation of the Splash theme - watercolors and an under the sea theme, working on a 8 x 10 in watercolor canvas by Prima. I had fun doing a bunch of different techniques for creating texture on this watercolor piece, and I'll show you how easy they are below. Tim Holtz Sea Life stamp set was perfect for this canvas.

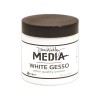
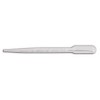
I started by applying gesso at the base of the canvas, where the bottom of the sea would be. By pressing the palette knife into the gesso and pulling it up, I got the textures that you can see here.

The images were stamped with Jet Black ink. I messed up the stamping on the octopus, but could luckily fix it with the help of a stamp positioner.

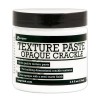
Apply Opaque Crackle Paste through the Speckles stencil, where the top of the water will be.

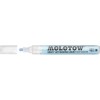
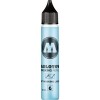
I used a Molotow Masking Marker to add bubbles to the background, and also did some through the Splatter stencil. This masking fluid is very easy to use.

After testing that it wouldn't affect the ink, I applied masking fluid all over the stamped images, being careful not to go beyond them since I didn't want a while halo around the images.

The water was painted with watercolors and I pressed cling wrap into the wet paint, shaping it to create texture. Leave until the paint is dry, no peeking!

In the sky area, I sprinkled both fine and chunky salt. Leave until it is dry and then brush off.

Rub off the masking fluid from the images and dots.

Paint the images with watercolors, and add a dot to some of the bubbles.
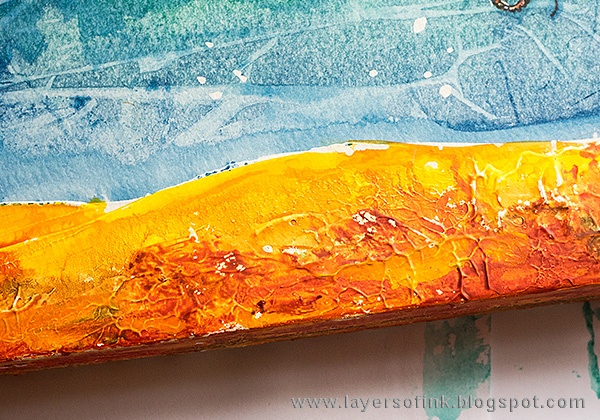
Paint the gesso with watercolors - don't use too much water or the paint doesn't cover the gesso well.

When dry, wipe off some of the paint from the texture.

Stamp the sea weed with Broken China and Jet Black, off stamping on a scrap paper first for the latter ink.

To add even more texture, I glued some shells to the bottom of the sea and added Crystal Glass Beads. Smear some Matte Medium on the area first and sprinkle with beads.

You can wipe off some of the paint from the crackled foam at the top of the sea. I also painted birds into the sky.

The sentiment was stamped on the background. Also paint shadows under the images.

The cling wrap leaves a very cool textured look. It is one of my favourite watercolor techniques.

I also glued some drops to the background.

The yellow paint I used was a little too opaque and I should have picked a more transparent yellow instead. You can see that on the octopus.

On the seahorse, I only used a tiny bit of the opaque yellow, and instead mainly used a transparent one.

I also glued some seed beads to the background. Add a dot of matte medium with a tooth pick and place the bead into the glue.
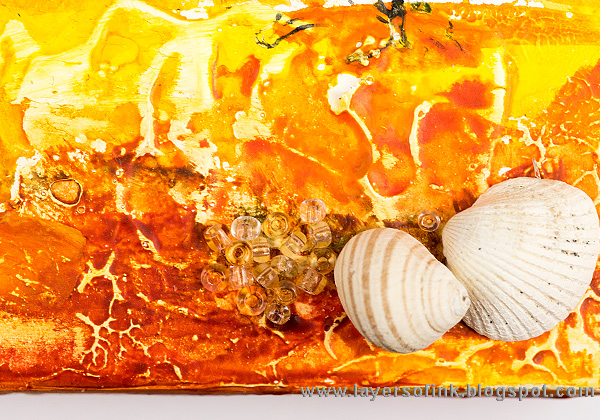
The beads at the bottom were a little hard to photograph.

Since the beads are transparent, they add texture, without being overwhelming and drawing too much attention to the bottom of the sea.

Glue some beads on top of the shells too.

I really like Prima's watercolor canvases and they give you a piece which is ready to hang on the wall immediately, without having to add a frame. I also really like to extend my scene onto the sides of the panel. You can also do the techniques on ordinary watercolor paper, of course.

This is the other side, with bubbles. For more inspiration on both the cling wrap and salt technique, check out my Textured Watercolor Journal Page.

Don't forget to follow Simon Says Stamp on Instagram, they post great stuff daily.


Thank you so much for visiting today! Have a lovely week!
Happy crafting!
Anna-Karin
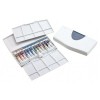
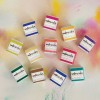
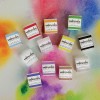
Supplies:


Great canvas with so many techniques. Thank you for the step by step. I forgot last week to express my condolences to everyone in Sweden for the horrible attack in Stockholm. My heart goes out to everyone that has suffered.
ReplyDeleteThank you so much Marci! And for your kind words.
DeleteThis is beautiful, Anna-Karin. I love your sea creatures, especially the octopus. The background with all the texture and fun with the Molotow pen is amazing!
ReplyDeleteCathie ♥
What a fantastic sea scene! Love it Anna-Karin!!!
ReplyDeletex
Dit is nou werklik pragtig Anna-Karin!
ReplyDeleteWhat a great underwater scene! I loved too see how you made this magic background! So creative. Hugs, Marzena.
ReplyDeleteWhat a fabulous canvas Anna-Karin, the textured and coloured water looks amazing and I am totally in love with the octopus and seahorse! Great step by step too. Anne x
ReplyDeleteWonderful canvas. I love all of the details. Great colors and living in Washington state I love water. This is just beautiful.
ReplyDeleteAnna-Karin, your work is always amazing. I love all of the colour and texture you have added on this canvas. (I can see this hanging in a bathroom, it would be just beautiful!) Well done!
ReplyDeleteabsolutely gorgeous canvas Ann-Karin!! The textures and layers are perfect for this scene. Thanks for sharing the step outs too-I didn't know there was such a thing as a masking fluid pen;)
ReplyDeleteThank you Linda! The masking fluid pen is awesome, so much easier to use than ordinary masking fluid. :)
DeleteStunning canvas, Anna-Karin! Love the layers of color and the textures :)
ReplyDelete*mwah*
Steph
Simon Says Stamp!
Gorgeous canvas Anna-Karin, I love the whole underwater scene, absolute fabulous 😍
ReplyDeleteLuv
Lols x x x
Awesome tutorial, terrific techniques, the details are fantastic!
ReplyDeleteFantastic! Love the underwater scene you've created. Awesome technique with the wrap, and great mix of color, texture and images! It does sound like you had some very strange weather! hugs, Maura
ReplyDeleteThank you Maura! Very weird weather! During our walk on Monday, we had heavy snowfall three times, and in between perfect (although chilly) spring weather. And this evening, Leo and I got a whole lot of hail on our walk.
DeleteFabulous textured underwater scene. I may have to give in to that stamp set, just to get the Octopus for my nephew who's obsessed with them and squid! Brilliant splashy inspiration.
ReplyDeleteAlison x
This is amazing Anna-Karin! I love all the wonderful texture! Thanks for the tutorial!
ReplyDeleteI was going to use these stamps on my project but decided on a different take at the last minute but I LOVE the canvas you've created using these, Anna-Karin and adore the scene you've made...fabulous work as always! :)
ReplyDeleteGorgeous canvas, love all the techniques for building up textures. Lou x
ReplyDeletebeautiful canvas Anna-Karin..thank you for sharing how you created that amazing background...hugs kath xxx
ReplyDeleteThis is such a cool and beautiful canvas, Anna-Karin. Love the fantastic colors and those step photos are awesome! :)
ReplyDeleteThis is my favorite palette ! You are fantastic, this sea canvas is absolutely amazing, love you used Tim's stamps and all the techniques is fabulous! Thanks for sharing with us! Barbara
ReplyDelete